

Introductions:
Now you would ask me;What guts I am
trying to prove on tracking the development of these mini-PC
sticks?Well, nowadays ,computers are becoming smaller and smaller and that
proportionate to their cost-cheaper.And I know you would believe me, single board PC
did not compromise computing speed ,functionality ,efficiency yet with
lesser consumption of electricity (5V/2A) ; we called this "nano-technology" on
computers.Imagine a supercomputing machine is just smaller than the
palm size of your hand.Simple,with its cheap price, I can purchase
numbers of minis-PC and afterwards create a prowess of varied
R&D applications.A variety of testing instruments:embedded
Oscilloscope,Analyzer, high speed cameras,and all the likes.Because it's a
light-weight machines ,we can board as many PCs as we can, to
make our machine or robots think, process more and intelligent
enough to respond in our specific purpose .An out-of-the-box super computing machine,
clustered mini-sticks is just an appliance that can be stored atop your
desk.The rest are the R&D of a lifetime-not yet to be told-but
they're arrayed in the mind .This minute gadget is a heavenly concept
making things happen in reality( :) ).
I have tried different single board PC from STMF32 ,ARM Cortex 3, Beagle board,Mini2440 and mini6440 and had experienced the difficulties in loading or flashing firmwares into its embedded system.Though its quite complex , I was lucky that there were several documents available as an included resources,besides they have the technical support on-line.Sometimes you need to decode Chinese language to know the hidden specifications-at least that could be a right path of porting different codes and libraries.
RK3066 is dual Core Cortex-A9 processor running at up to 1.6 GHz produced on 28 nm process, with quad core Mali 400 @ 533 Mhz.These features are enough to settle in the higher application system-but when it comes to controlling,brute forcing hardware applications -we have a different story.
Actually , I did n't have to flash android OS into Picunto or Ubunto,but it so sad that Android OS is not meant for embedded and servering applications.Another is that Rockchip is still in the stone age, they require NDA(non disclosure agreement) and $5000 to send you SDK for building Android images which even have no sources inside but binary blobs.So I have no choice but to change its OS into an appropriate one. Yet this is not an easy task for there is no instant or direct Linux installations in the RK3066 chips other than android itself.
All Rockchip kernel and Linux support so far is done by group of
hackers who reverse engineer their code for fun and they have already
significant success.The community would like to thanks hacker/crackers who had patiently ported and given source code for free: AndrewDB,Olegk0,JustineTime4Tea,mosfet,E^3 and others.
So folks ,please read and join me as this scratch article go along the saga and odyssey of porting ,debugging and unlocking the trade secrets of this nano-made gadgets and bring the breakthrough into the open-source community.
Requirements:
Software:
MK808 kernel image (recovery.img)
https://github.com/olegk0/rk3066-kernel
Rooted Image files
http://cdn03.arctablet.com/mirrors/picuntu_home-io/homeio_rc1.tar.gz
Olegk0 Google Drive Folder
https://drive.google.com/folderview?id=0B6QRwjacGTzCU3RWZ1M2d1FkcTg&usp=drive_web
Olegk0 Google Drive Folder
https://drive.google.com/folderview?id=0B6QRwjacGTzCU3RWZ1M2d1FkcTg&usp=drive_web
https://github.com/justgr/arnova-tools
Hardware:
Paper clip
MK808 mini-PC stick
micro-SD adapter
micro-SD card
Objectives:
To write and flash RK3066/MK808 image by using Linux alone(no windows!)
To replace default android OS by Picunto/Ubunto for future system development
To maximize the applications of mini-PC MK808 as dual core running in Linux
Methodology:
Download the latest release versions of MK808/RK3066 Linux image(cut & paste in your browser)
https://doc-0c-b8-docs.googleusercontent.com/docs/securesc/ha0ro937gcuc7l7deffksulhg5h7mbp1/5c55spo7th4lg7cfnlu8e07a5edfmro1/1384315200000/09152317978381813842/*/0B6QRwjacGTzCNG45bGZWRHlycUE?h=16653014193614665626&e=download
Find the necessary tools for flashing firmware image in the SD card
root@locahost# wget
https://github.com/justgr/arnova-tools/blob/master/rkflashtool/rkflashtool.cInstall the required USB software libraries in Linux OS
root@localhost# sudo apt-get install libssl-dev libcrypto++-dev
Press down the recovery button (using a paper clip)
Power up the RK3066 device from only the OTG port using a standard usb cable
Note:
(special OTG cable required or shorting of the sense pins)
Please plugged the OTG-USB cable into your PC (running linux.)
After 5 seconds release the button. observed that no led will turn on at this point.
Run dmesg and you should see something like detail 1:
root@localhost# dmesg
Run lsusb and make note of the device id
root@localhost# lsusb
My MK808 vendor ID is 2207:300a
Let's compile the rkflashtool.c
root@localhost# tar -zxvf rkflashtool.tar.gzroot@localhost# cd rkflashtool/
root@localhost# vim rkflashtool.c
...cut and paste the code phrase highlighted in detail (3) then run the program
root@localhost#gcc -o rkflashtool rkflashtool.c -lusb-1.0 -O2 -W -Wall -s.
We're now ready to read the flash(a moment of truth :) ).
As a first step you may dumped the entire 8GB NAND flash as a backup like so
Note:
It will take some time to backup the whole NAND.
root@locahost rkflashtool r 0x00000000 0x01000000 > myflashbackup.bin
To quickly get an idea of where everything is in the flash you can run CLI command below . It will reveal the parameters which include the offsets for all images in NAND including boot, system and user.
root@localhost# hexdump -C myflashbackup.bin | more
As an example to grab the kernel I did the following:
root@localhost# rkflashtool r 0x00004000 0x00004000 > mk808kernel.img
To upload a new kernel do the following:
root@localhost# rkflashtool e 0x00004000 0x00004000
root@localhost# rkflashtool w 0x00004000 0x00004000 < recovery.img
Tips!:
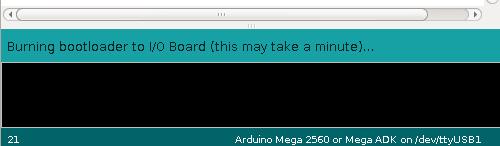
After a successful loading the kernel image (recovery.img) you can now reboot the stick and check picture details (6 & 7)- you're on the right track brother.So you may proceed now to partitioning your SD card and inserting Debian file-systems into it:)
Partitioning your SD Card
root@localhost# yum install gparted*
root@localhost# gparted
1) Create an "ext4" partition
2) resize the partition atleast 5GB or larger
3) label it with "linuxroot"
4) Apply the changes
After the kernel image was flashed, it's time to copy your linuxroot(File System), be sure that you are in a root mode
root@localhost@ tar-zxvfp home_io.tar.gz /run/media/robook/linuxroot
or
root@localhost# tar -zxvf home_io.tar.gz
root@localhost# cd picunto_linuxroot_rc
root@localhost# cp -R * /run/media/robook/linuxroot
Note! Please wait until all files are copied to avoid errors in the picunto boot up
Details:
1) Please run the lsusb command

2)Next run the dmesg command to find vendors ID

(3)After finding the vendors ID ,copy the highlighted code in the rkflashtool.c

(4)Testing rkflashtool-> dumping NAND

(5)Flashing the new kernel image "recover.img"

(6)Booting the MK808 in Linux -pre install "BusyBox OS"

(7)System and files

(8) Partitioning the SD card ("ext4"-File System- 5++ GB

(9) MK808 device using HDMI VGA adapter

10) Picunto2.2 Login

11)Picunto 2.2 Desktop (xfce)

12) Checking OS libraries and apps

Remarks:
Accomplished the easy task (?) of booting MK808 in Linux
Trouble: BusyBox not booting
Shooting: Please redump the micro-SD card using the rkflashtool
Trouble: Need complete files
Shooting: Please get the latest kernel image and rooted image linux files(application etc)
Trouble: "Mountall Event Fail
Shooting: Try recopying the linuxroot by using "cp -a * or tar -zxvpf" to transfer the compress files into the SD card "ext4" linuxroot directory.
1) Incomplete/unfinished copy
2) Fail with root permission and authorizations transfer of files
Conclusions:
I have a mini-PC MK808 (dual core) running in Linux(how about that bro?)


