
 |
| Minix NEO X5 |
A couple of weeks ago ,I've noticed that a NEO X5 tv was still left unbox in the other corner of my cabinet ,so I sat down with my stuffs in my workbench and had a harder time of cracking Minix Neo X5 to function in Linux -Ubuntu.As what was expected,I should published blog before another Internet TV box will be ported in Linux OS(seemed I was obligated-huh!). Well, this could be a matter of re-orienting my e-hobby as I am rushing time for an activity which is so important than doing this one(itanung nyo na lang kay Igorota).But still, I decided to get all the bunch of paraphernalia -and there you have it now,a new cracked Linux OS for TV Minix box .
Actually it's a sort of personal desire ,as I want to do the cracking entirely in Linux (pls. no windows) , and its hard to find a complete DIY of booting Minix box solely in the said platform .So I started looking for a rkflashtool (Rockchip Flasher tools and firmware) that could be flashed into its NAND memory of Minix NEO X5 .As usual,the technique is to modify the code by first finding usb ID address referring to the dual-core RK3066(this time the NEO X5) ,then changing the line parameter of rkflashtool.c is required .Additional info is the filesystem used to have the Minix boot to both ubuntu and customized Picuntu .
Actually it's a sort of personal desire ,as I want to do the cracking entirely in Linux (pls. no windows) , and its hard to find a complete DIY of booting Minix box solely in the said platform .So I started looking for a rkflashtool (Rockchip Flasher tools and firmware) that could be flashed into its NAND memory of Minix NEO X5 .As usual,the technique is to modify the code by first finding usb ID address referring to the dual-core RK3066(this time the NEO X5) ,then changing the line parameter of rkflashtool.c is required .Additional info is the filesystem used to have the Minix boot to both ubuntu and customized Picuntu .
This scratch article will discuss the boot process used on the Minix Neo x5, and some formats/contents of each NAND (aka ROM) partition.In this way,we can understand or manipulate the configuration of its build. Other geeks have a make up new 'rom's for the systems and produced these '.img's (recovery), and the documentation is here for those who want to get in on the cracking.
From the RK3066 Tech Ref Manual , the RK chip has a boot ROM and some default operations to look for suitable boot partitions on NAND and SDcard devices to power up things. Also, the boot code able to load the kernel and some root filesystem to start running OS. The system, cache, userdata and user are normal linux filesystems which can be done by mounting them in the SD card, boot is a compressed bootloader code, kernel is the binary executable loaded and executed, recovery for an option of dual OS loading (Ubuntu/Android)
Again, I would like to thanks the following geeks on the Cyber Web : view wizard,jps,olegk0,AndrewDB,Elona Dika and others for their contributions of booting NEO X5 in linux.This scratch article aims to share anyone the procedures ,source code, or a replacement build for
the NAND partition images.
..............................enjoy the box build! -E^3
..............................enjoy the box build! -E^3
Requirements:
Hardware:
Minix NEO X5
PC running in Linux
OTG USB cable
Software:
Linux OS installed in your computer
rkflashtool
https://github.com/linuxerwang/rkflashkit
Ubuntu OS for the Minix NEO X5
https://googledrive.com/host/0BztHRbE8mM49TDc3WW1wMERUUkk/Ubuntu12.10_armhf_MINIXx5_CLEAN_ver0.1.tgz
Picuntu OS for the Minix NEO X5
http://cdn02.arctablet.com/mirrors/picuntu_home-io/
recovery image
https://googledrive.com/host/0BztHRbE8mM49TDc3WW1wMERUUkk/recovery.img
Objectives:
To install and boot linux(Ubuntu) in a Minix NEO X5
To enhance linux application using Minix NEO X5
To use Minix NEO X5 in a lowcost embedded computing projects
Methodology:
Step1: Flashing the firmware of Minix NEO X5
1) Find the necessary tools for flashing firmware image in the SD card
root@locahost# wget
https://github.com/justgr/arnova-tools/blob/master/rkflashtool/rkflashtool.c2) Install the required USB software libraries in Linux OS
root@localhost# sudo apt-get install libssl-dev libcrypto++-dev
3) Press down the recovery(reset) button using a paper clip or pin that can eject/push switch inside the tiny hole.
4) Power up the RK3066 device from only the OTG port using a standard usb cable
Note:
(special OTG cable required or shorting of the sense pins)
Please plugged the OTG-USB cable into your PC (running linux.)
5) After 5 seconds release the button; at this point check USB properties.
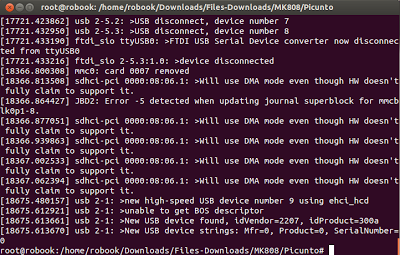
Run dmesg as you should see something liked detail 1
root@localhost# dmesg
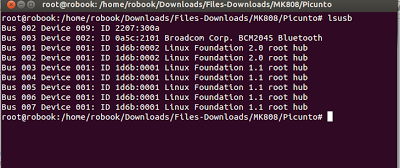
6) Run lsusb and make note of the device id
root@localhost# lsusb
My Minix NEO X5 vendor ID is 2207:300a
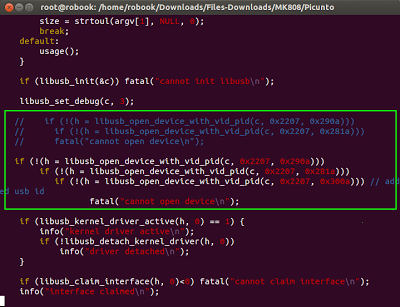
7)A vendor ID should be inserted in rkflashtool.c as liked in detail 2
root@localhost# tar -zxvf rkflashtool.tar.gz
root@localhost# cd rkflashtool/
root@localhost# vim rkflashtool.c
8)Let's compile the rkflashtool.c using gcc
root@localhost#gcc -o rkflashtool rkflashtool.c -lusb-1.0 -O2 -W -Wall -s
Note:
We're now ready to read the flash(a moment of truth :) ).
As a first step you may dumped the entire 8GB NAND flash as a backup like so
9)To backup the whole NAND-it will take sometime.
root@locahost rkflashtool r 0x00000000 0x01000000 > myflashbackup.bin
To quickly get an idea of where everything is in the flash you can run CLI command below . It will reveal the parameters which include the offsets for all images in NAND including boot, system and user.
root@localhost# hexdump -C myflashbackup.bin | more
10) To grab the kernel do the following:
root@localhost# rkflashtool r 0x00004000 0x00004000 < minixkernel.img
11) To upload a new kernel do the following:
root@localhost# rkflashtool e 0x00004000 0x00004000
root@localhost# rkflashtool w 0x00004000 0x00004000 < recovery.img
root@localhost# rkflashtool b
12) To have a dual booting with Android or Linux
root@localhost# rkflashtool w 0x10000 0x8000 < recovery.img
root@localhost# rkflashtool b
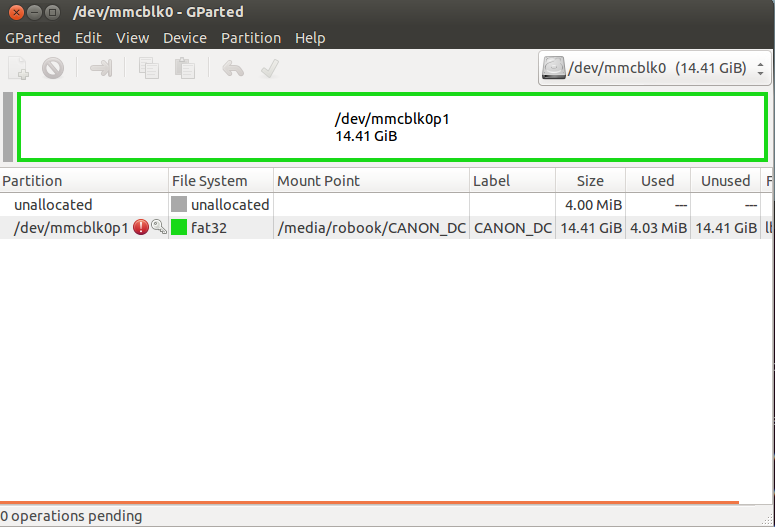
Step2:Partitioning the SD Card
Partitioning your SD Card
root@localhost# sudo apt-get install gparted*
root@localhost# gparted
1) Create an "ext4" partition
2) resize the partition atleast 5GB or larger
3) label it with "linuxroot"
4) Downloaded and untar file from the site
root@localhost# tar xvzf /PATH/ubuntu/picuntu.tgz -C /media/linuxroot/
Step3:Installations and booting
1) For wired network
root@localhost# nano /etc/network/interfaces
2) For wireless uncomment wireless network ,and in wpa-ssid put the name of your network and pasw
root@localhost# passwd dfasdf
root@localhost# iwconfig
root@localhost# reboot
3) Install Xubuntu interfaceroot@localhost# sudo apt-get update
root@localhost# sudo apt-get install xubuntu-desktop
4) Install Gnome interface
root@locahost# sudo apt-get install gnome
5) Creating X11 folder
root@localhost# sudo mkdir /media/linuxroot/etc/X11/xorg.conf.d/
root@localhost# cp -r /PATH_TO_FILE/exynos5.conf
/media/linuxroot/etc/X11/xorrg.conf.d/
6) Get the exynos5.conf file
root@localhost# wget https://www.dropbox.com/s/locvo5eotzxjg13/exynos5.conf
7.Start Minix and enjoy the interface
a) Ubuntu
username: ubuntu /password: ubuntu
username: root/password: 1234
b) Picuntu
username: root / password: 12qwaszx
username: picuntu /password: 12qwaszx
MySQL username: root /password: 12qwaszx
Details:
Details(1)Please run the lsusb command
Details(2)After finding the vendors ID ,copy the highlighted code in the rkflashtool.c
Details(3)Next run the dmesg command to find vendors ID
Details(4) Linux logo indicates kernel proper loading

Details(5) Partitioning SD Card using gparted command
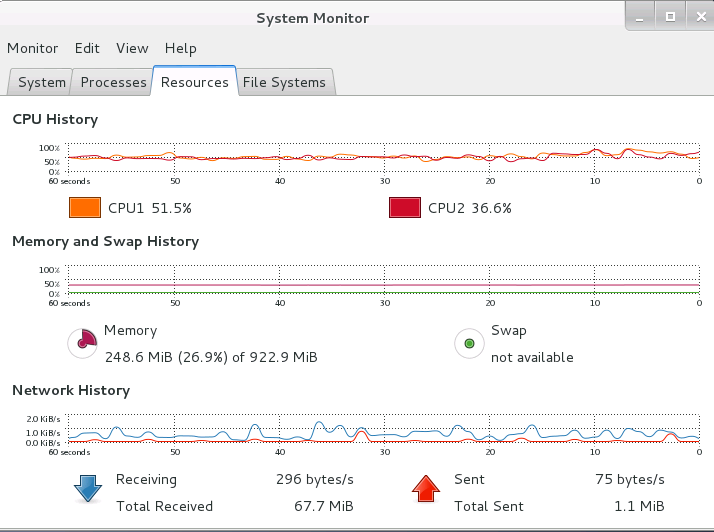
Details(6)CPU processing
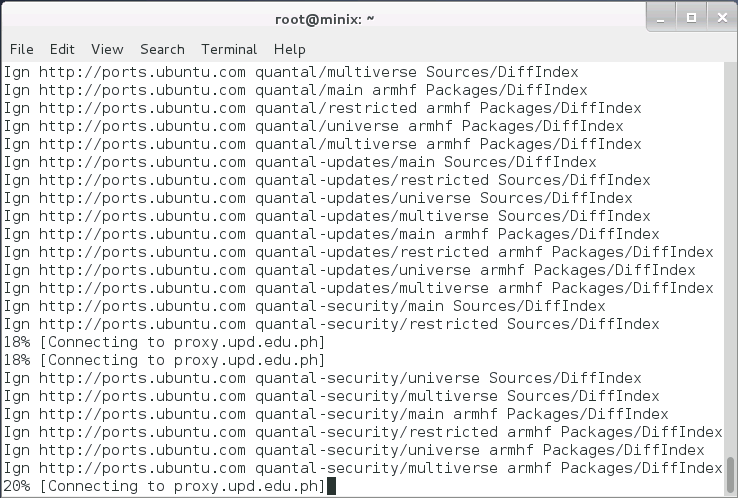
Details(7)Completing the package installation
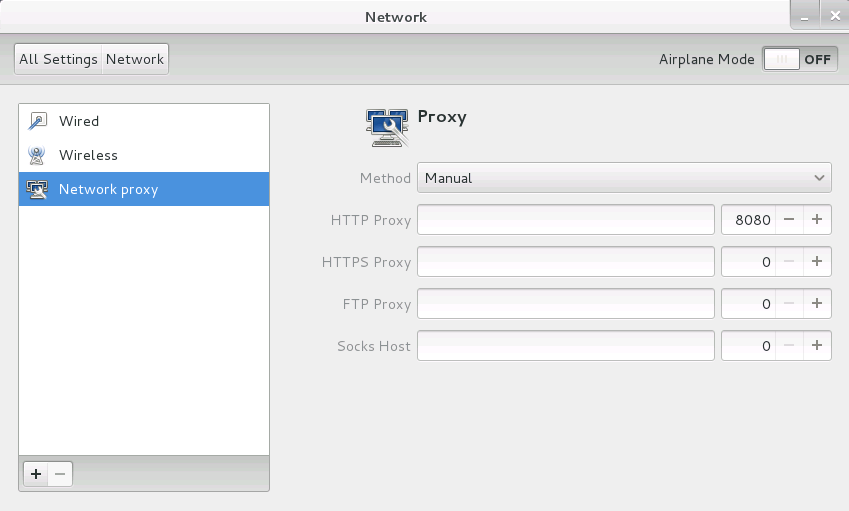
Details(8)Setting proxy
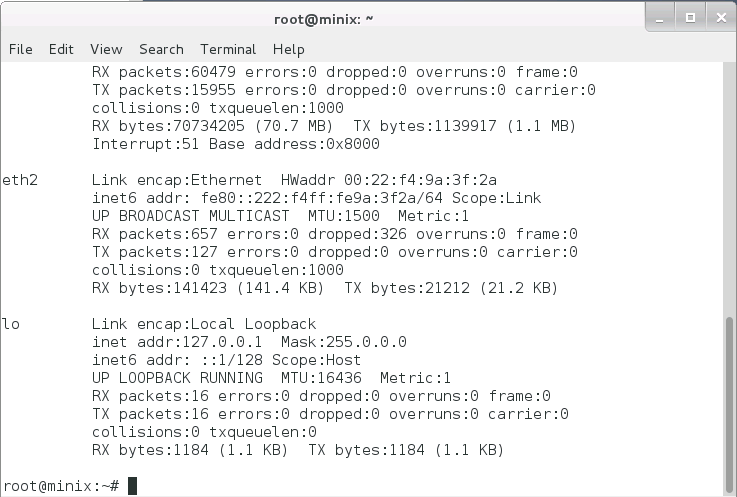
Details(9) IP address configuration (Wired /Wireless)
Details(10)Minix NEO X5 Desktop (Gnome)

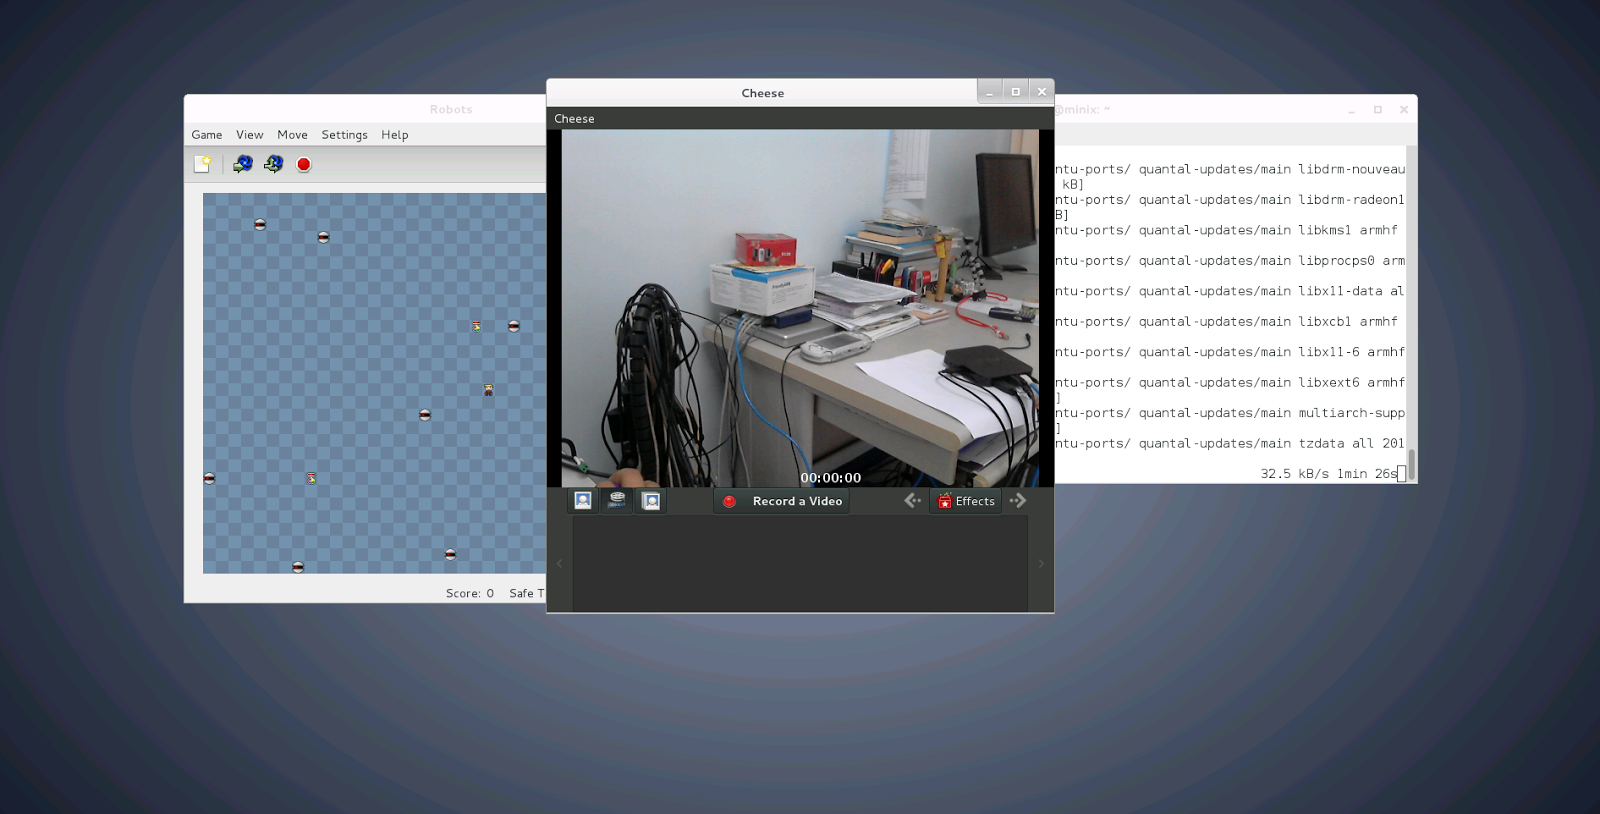
Details(11) Running application in the box
Summary:
1) Need to enhance 2D/3D graphics accelerations
Conclusions:
This concludes that booting and running Linux in Minix NEO X5 equals computing performance of a traditional PC but differs in power consumptions .Another is the flexibility and robustness of the box yet with an affordable price as compared to any thin clients or single board PC .