Wednesday, July 9, 2014

Buko Pi (Re-Inventing the Pi)


Introduction: 

I am a Linux enthusiast with more than a decade of experience in an embedded hardware/Software hobby, and a passion for an open source design as well. It is just a time to  explore the vast  possibilities of resources  that the open community had shared to everybody. In my  case, am willing to partake the computing industry-why? simple, all of us  need computers from toys,tablet to high end servers. 

I do want to uphold the vision  of Raspberry Pi(Banana Pi) project, and other similar ARM allwinner make CPUs.Thus, I  like to reinvent the  Pi with better hardware and software specifications plus a DIY and experiment tutorials  .See for example why use TV output for display when there are more  available VGAs and HDMI hardware ? Why only use an OS where in a kernel compilation  can embed code as built in function/s and make it stand alone device(its a monster MCU) ? And it's not only the  removable SD card but it also includes SATA port .This  Buko  Pi   can boot up with variety of  OS flavours  such as Debian Linux, Raspbien, Android, Arch Linux and so on. Well, since Microsoft had stopped Windows XP support cracker are invited all around the cyber to crack it and see if we can port the system as what Windows RT did. 

So Buko Pi, is a very promising development board as there are more applications awaits to be deployed and implemented. As long as Allwinners ,Rockchip,Linaro and other companies had opened their development in the community; to those geeks who are willing to innovate something for the usage of embedded system-its a big grace to thank for.

My vision is to start with low-cost and more hardware capabilities  of Buko Pi that will suits to the need of academic community  ,then we could foster lots of contributions in the  industrial,agricultural  or  in the scientific fields from time to time. At least here in the archipelago; and so, be it happen folks!


Requirements:

Software:
Ubuntu/Debian Image
https://github.com/LeMaker

Hardware
Buko Pi
SD Card/Sata Drive


Objectives:
1) To test and enhance a dual core A20  development board
2) Use Buko Pi for Linux (debian,Fedora,etc ) OS
3) To use Ubuntu applications


Details:

1) Buko Pi Development board


2) Buko Pi Operating system's compilation


Summary


Conclusions:

Getting to know  Buko Pi

Sunday, June 1, 2014

( RK3188/MK809 ) Embedded Web Server


Introductions:

For now, it is good that there are so many XBMC, mini-PC, dongle and stick available online. Local hobbyists are becoming very much more  enthusiastic to learn new embedded system behind  gadgets. To the younger generations,their  interest and excitements show about  popularity of  techno hobby in our country. Well ,this is a good indications of imminent R&D community , start-ups on the rise, and  more electronic hobbyists contributing their experiences  to  operate and tweak this micro embedded PC. Who knows anyway ?

But  my purpose is to have a cheaper computer that could saves a lot of cost ,  processing  and external peripherals. A server for host testing and debugging  which has a very minimal electricity consumption, portable,flexible and a pocket size computer. I have been testing my quad core micro server for a weeks now , and it gives me a very satisfying performance.So I decided to have a rough draft hoping to share  technical information about implementing and deploying micro server using quad core Arm based mini stick pc. 

By the way, I have discussed a while ago how to compile and flash kernel  in the RK3188 /MK809 mini stick,just I need a little more  screen shots for the additional details.http://cobecoballes-embedded.blogspot.com/2014/01/rk3188-minipc-booting-installing-linux.html .I will be posting here the steps and procedures how to use this RK3188 quad-core CPU  as a complete host server, as usual we have the basic application software to use. Our operating system will be debian a lubuntu /Picuntu NAND based for RK3188 cpu, and the rest are: Apache2,Php5 and MySQL . Let us also try sample application ,like web program and some scripts ,just comment below for some tips and clarifications about the post.

Before anything else, I would like to thanks the cyber folks who have spent time to contribute a lot so that all the technical developments are open resources.

Thanks to all of you. 

Requirements:

Hardware:
RK3188 mini stick (quad core ARM CPU)

Software:
Picuntu 4.4/4,5 or Lubuntu (RFS)
Apache ,Nginx ,PHP5, MySQL,TigthVNCserver
RKFlash

Objectives:
To compile , install and boot Linux-Ubuntu (13.4)  in RK3188 Mini PC
To install Apache2, Nginx, Php5 and MySQL
To deploy sample web program


Methodology :

1) Download Picuntu 4.5 Nand Basic GUI  image
http://www.g8.net/download/4.5/picuntu-4.5-basicgui-nand.7z

2) Using RKFlash flash the image (see to it the you are in a debug mode -OTG)
Please see to it that you have checked(/)
- Parameter
- Boot
- Kernel
-System
and unchecked()
Misc
Recovery
Back-Up

Erase Nand then Flash ROM

3) Access the new Picuntu (Lubuntu) OS
username:root
password: 12qwaszk

3.1) Connect to Wireless network (using menu or shell)
id:
key:

3.2)  using shell network configurations
root@g8picuntu#  vim /etc/network/interfaces

auto lo

iface lo inet loopback
iface eth0 inet dhcp

# could be wlan1 ,wlan2
allow-hotplug wlan0
auto wlan0


iface wlan0 inet dhcp
        wpa-ssid "wifi ssid"
        wpa-psk "wifi password"


4) List of  the download package
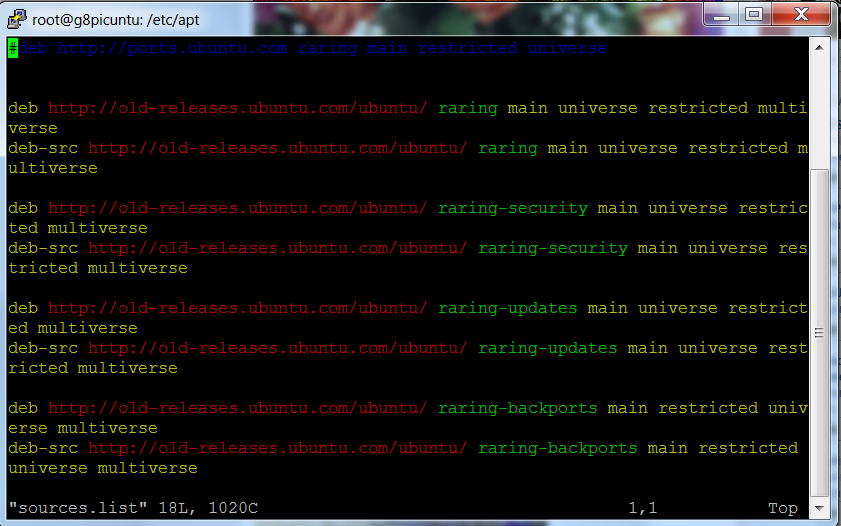
root@g8picuntu#  vim /etc/apt/source.list

4.1)  Update the package
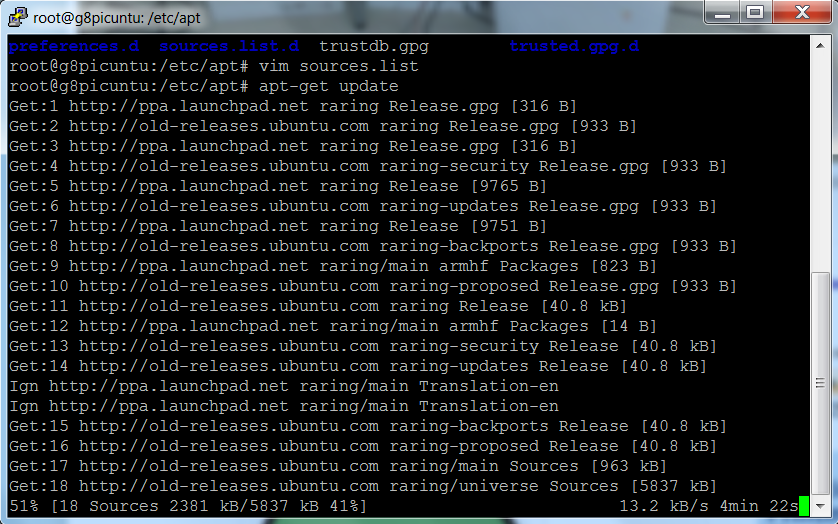
root@g8picuntu# apt-get update

5) Install Apache2, Nginx, Php5 and Mysql

root@g8picuntu#  apt-get install  apache2 ,nginx,, mysql-server libapache2-mod-php5 libapache2-mod-rpaf php5-mysql php5-curl php5-gd php-apc php5-mcrypt


6.) Checking access through vnc
root@g8picuntu#  apt-get install tightvncserver
root@g8picuntu# tightvncserver
password: "your password"

6.1)  Access IP-address of client PC ,examples 192.168.1.15:1

7 ) Test sample program and lets get back to usual setting of an ordinary Linux box
root@g8picuntu# cd /var/www/

Details:

Details:


Details:


Details:


Summary:


Conclusions:


Wednesday, February 26, 2014

Minix NEO X5 booting in Linux(Ubuntu)


Minix NEO X5


Introductions:
A couple of weeks  ago ,I've noticed  that a NEO X5 tv was still left unbox in the other corner of my cabinet ,so  I  sat down  with my stuffs in my workbench and had a harder time   of cracking  Minix Neo X5 to function in Linux -Ubuntu.As what was expected,I should  published blog  before another Internet TV box  will be ported in Linux OS(seemed I was obligated-huh!). Well, this could be  a matter of re-orienting  my e-hobby as I am rushing time for an activity which is so important than doing  this one(itanung nyo na lang kay Igorota).But  still, I decided to get all the bunch of paraphernalia -and there you have it now,a new cracked Linux OS for TV Minix box .

Actually it's a sort of personal desire ,as I  want to do the cracking  entirely  in Linux (pls. no windows) , and its hard to find a complete DIY of  booting  Minix  box solely in the said  platform  .So I started looking for a rkflashtool (Rockchip Flasher  tools   and  firmware) that could be flashed  into its  NAND memory of Minix NEO X5 .As usual,the technique is   to modify the code  by first finding   usb ID address  referring to the  dual-core RK3066(this time the NEO X5) ,then changing  the line parameter of rkflashtool.c  is required .Additional info is the filesystem used to have the Minix boot to both ubuntu and customized Picuntu .

This scratch article will discuss the boot process used on the Minix Neo x5, and some  formats/contents of each NAND (aka ROM) partition.In this way,we  can understand or manipulate the configuration of its build. Other geeks have a make up new 'rom's for the systems and produced these '.img's (recovery), and  the documentation is here  for those who want to get in on the cracking.

From the RK3066 Tech Ref Manual , the RK chip has a boot ROM and some default operations to look for suitable boot partitions on NAND and SDcard devices to power up things. Also, the boot code able to load the kernel and some root filesystem to start running OS. The system, cache, userdata and user are normal linux filesystems which can be done by mounting them in the SD card, boot is a compressed bootloader code, kernel is the binary executable loaded and executed, recovery for an option of dual OS loading (Ubuntu/Android)

Again, I would like to thanks the following geeks on the Cyber Web : view wizard,jps,olegk0,AndrewDB,Elona Dika and others for their contributions of booting NEO X5 in linux.This scratch article aims to share  anyone  the procedures ,source code, or a replacement build for the NAND partition images.

..............................enjoy the box build!   -E^3

Requirements:
Hardware:
Minix NEO X5
PC running in Linux
OTG USB cable

Software:
Linux OS installed in your computer

rkflashtool
https://github.com/linuxerwang/rkflashkit

Ubuntu OS for the Minix NEO X5  
https://googledrive.com/host/0BztHRbE8mM49TDc3WW1wMERUUkk/Ubuntu12.10_armhf_MINIXx5_CLEAN_ver0.1.tgz

Picuntu OS for the Minix NEO X5
http://cdn02.arctablet.com/mirrors/picuntu_home-io/

recovery image
https://googledrive.com/host/0BztHRbE8mM49TDc3WW1wMERUUkk/recovery.img

Objectives:
To install and boot linux(Ubuntu)  in a Minix NEO X5
To enhance linux application using Minix NEO X5
To use Minix NEO X5 in a lowcost embedded computing projects

Methodology:

Step1: Flashing the firmware  of  Minix NEO X5
1) Find the necessary tools for flashing   firmware image in the SD card
root@locahost# wget 
https://github.com/justgr/arnova-tools/blob/master/rkflashtool/rkflashtool.c

2) Install the required USB software libraries in Linux OS
root@localhost#   sudo apt-get install libssl-dev libcrypto++-dev

3) Press down the recovery(reset)  button using a paper clip or pin that can eject/push switch inside the tiny hole.

4) Power up the RK3066 device from only the OTG port using a standard usb cable

Note:
(special OTG cable required or shorting of the sense pins)
Please plugged the OTG-USB cable into your PC (running linux.)

5) After 5 seconds release the button; at this point check USB properties.
Run dmesg as you should see something liked  detail 1


root@localhost# dmesg

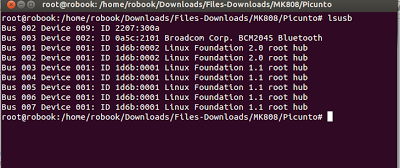
6) Run lsusb and make note of the device id
root@localhost# lsusb
My Minix NEO X5  vendor ID is 2207:300a

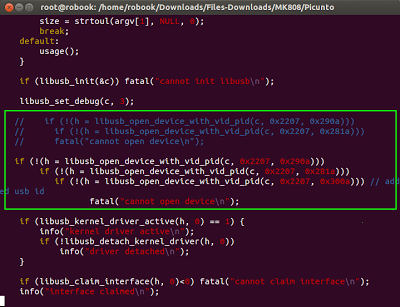
7)A vendor ID should be inserted in rkflashtool.c  as  liked in detail 2
root@localhost# tar -zxvf rkflashtool.tar.gz 
root@localhost# cd rkflashtool/
root@localhost# vim  rkflashtool.c

8)Let's compile the rkflashtool.c using gcc
root@localhost#gcc -o rkflashtool rkflashtool.c -lusb-1.0 -O2 -W -Wall -s

Note:
We're now ready to read the flash(a moment of truth :) ).
As a first step you may dumped the entire 8GB NAND flash as a backup like so


9)To backup the whole NAND-it will take sometime.
root@locahost    rkflashtool r 0x00000000 0x01000000 > myflashbackup.bin


To quickly get an idea of where everything is in the flash you can run CLI command below . It will reveal the parameters which include the offsets for all images in NAND including boot, system and  user.
root@localhost# hexdump -C myflashbackup.bin | more

10) To grab the kernel do the following:
root@localhost#    rkflashtool r 0x00004000 0x00004000 < minixkernel.img

11) To upload a new kernel do the following:
root@localhost#    rkflashtool e 0x00004000 0x00004000
root@localhost#    rkflashtool w 0x00004000 0x00004000 < recovery.img
root@localhost#    rkflashtool b

12) To have a dual booting with Android or Linux
root@localhost#    rkflashtool w 0x10000 0x8000 < recovery.img
root@localhost#    rkflashtool b


Step2:Partitioning the SD Card
Partitioning your SD Card
root@localhost# sudo apt-get install gparted*
root@localhost# gparted

1) Create an "ext4" partition
2) resize the partition atleast 5GB or larger
3) label it with "linuxroot"
4) Downloaded  and untar file from the site
root@localhost#  tar xvzf /PATH/ubuntu/picuntu.tgz  -C  /media/linuxroot/

Step3:Installations and booting
1) For wired network
root@localhost#  nano /etc/network/interfaces

2) For wireless  uncomment wireless network ,and in wpa-ssid  put the name of your network and pasw
 root@localhost# passwd dfasdf
 root@localhost# iwconfig 
 root@localhost#  reboot

3) Install Xubuntu interfaceroot@localhost# sudo apt-get update
root@localhost# sudo apt-get install xubuntu-desktop

4) Install Gnome interface
root@locahost# sudo apt-get install gnome

5)  Creating  X11 folder
root@localhost# sudo mkdir /media/linuxroot/etc/X11/xorg.conf.d/
root@localhost# cp -r /PATH_TO_FILE/exynos5.conf
/media/linuxroot/etc/X11/xorrg.conf.d/

6) Get the  exynos5.conf file
root@localhost# wget  https://www.dropbox.com/s/locvo5eotzxjg13/exynos5.conf

7.Start Minix and enjoy the interface
a) Ubuntu
username: ubuntu /password: ubuntu
username: root/password: 1234

b) Picuntu
username: root / password: 12qwaszx
username: picuntu /password: 12qwaszx
MySQL username: root /password: 12qwaszx

Details:
Details(1)Please run the lsusb command


Details(2)After finding the vendors ID ,copy the highlighted code in the rkflashtool.c


Details(3)Next run the dmesg command  to find vendors ID
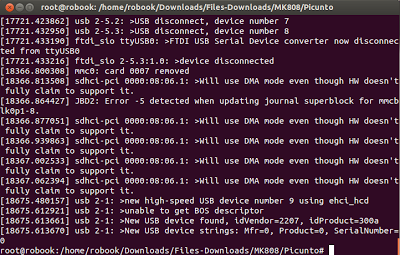


Details(4) Linux logo indicates kernel proper loading


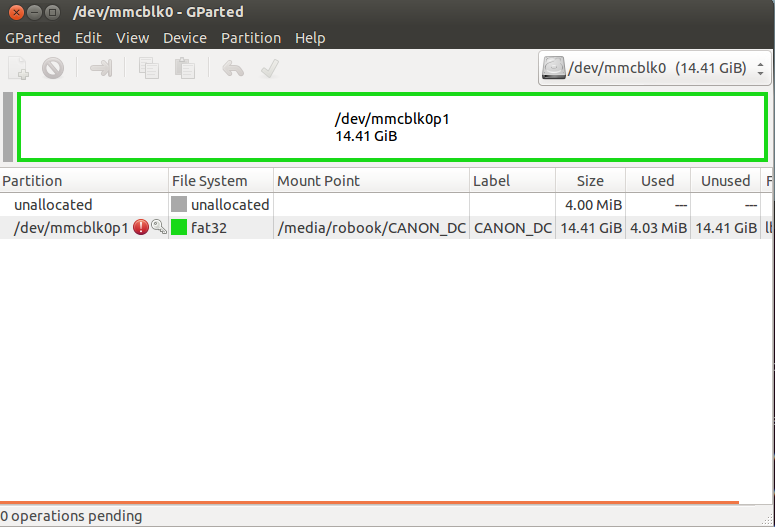
 Details(5) Partitioning SD Card using gparted command


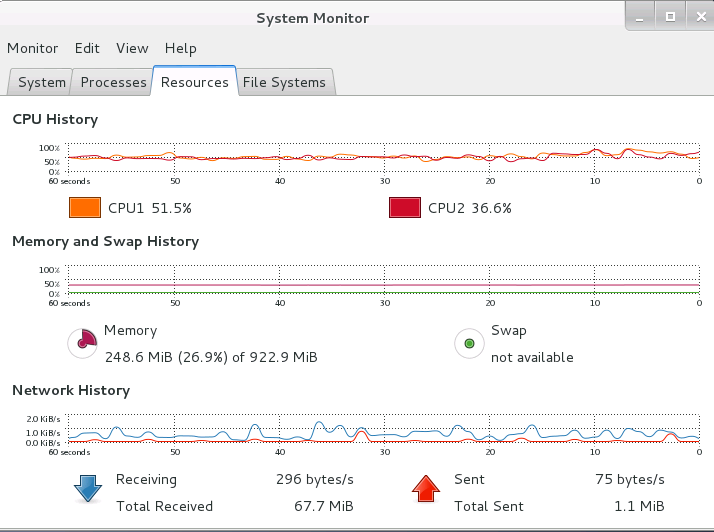
Details(6)CPU processing


Details(7)Completing the package installation
 

Details(8)Setting proxy


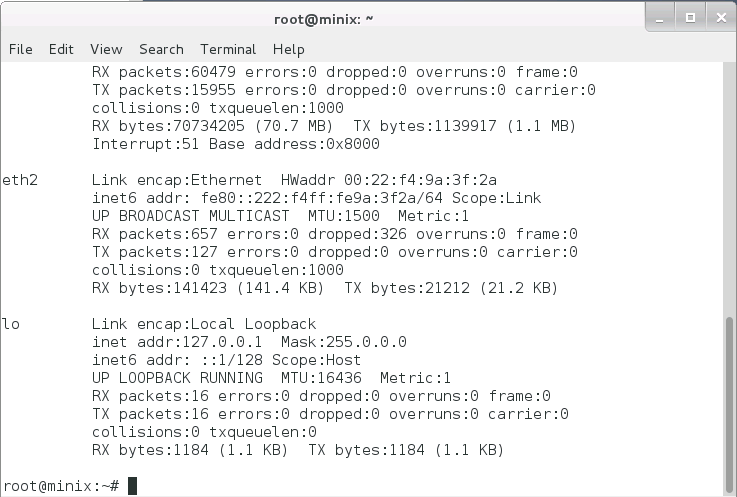
Details(9) IP address configuration (Wired /Wireless)


Details(10)Minix NEO X5 Desktop (Gnome)


Details(11) Running application in the box


Summary:
1) Need to enhance 2D/3D graphics accelerations


Conclusions:
This concludes that booting and running Linux in Minix NEO X5  equals  computing performance of  a traditional PC but differs in power consumptions .Another is the flexibility and robustness of the box   yet with an affordable  price as compared to any thin clients or single board PC .


Monday, January 13, 2014

Real-Time Data Aquisition online Graph (Arduino)


Introductions:

Its been  a while that we had posted here the different tutorials ,DIY ,How-tos that discussed  embedded system.But this time we'll be dealing with web programming  and  simple database to log  data  and graph the  corresponding informations  on the web.We also solicited tips and ideas about web programming  especially Java-scripting; and I would like to mention them: Sir Tito,Richard and Sir Val as my buddy of  experts in the said field. 

Besides, we've crawled the net to select which available graphing tools are easy to used and offer a lot of features . As we google all the tips & tricks pertaining to  this topic, it seems that geeks have their  different scheme and designs how they graph data in the internet.Well, it depends  upon us which of which tutorials meet our appetite to do internet of  things-web data logging. By downloading all the resources , I came up with a simple technique on how to classify procedures   graphing/charting  data on-line either simple or complicated.

A very good tips & trick to simplify the said system is to render  the design and task into three procedures of simple open or close control system; and these are the following:

Input ---------------------------------------> Process -------------------------------------> Output

Input/s . These are the source of signals analogue /digital coming from your sensors or transducer .
In our discussion , temperature ,humidity ,light sensor signals.All these inputs are being feed trough an I/O communication port (rs232,i2C ,SPI ) of microcontroler (Arduino) .Our MCU will handles channelling and  protocols before we proceed into the stage of processing. 

Process. A stage where  we contained , modify , grouped and the conversion of  various  formats of data .In this stage ,data type were already identified ,yet web protocols will decode it as as series of string like format of data. 
In our discussion , data will be populated , stored and polled from MySql and update of its database sets only to the first row id.  PHP script will  echo rows of data queried by JavaScript .This row of data  from record set will be parsed inside the html program .Therefore polled data serve as the parameter being process as a substitute to the  coordinates of lines to be plot in the chart.

Outputs. A stage where data is being interpreted  and results to a sensible and definitive informations.It could be further used as reference to the previous stages.In our discussion , we simply plot the data and produce a meaningful graph or chart.

So what are we waiting for? Get the code and start running until we can think another ideas that required us web programming and on-line data logging.Please follow  the tutorials as enumerated below.

Cheers!


Note:
You may use the myC.c to simulate inputs from MySQL so that  we can run the program without MCU at first.


Requirements:

Software:
Linux OS : Fedora/Ubunto
Flot library (http://code.google.com/p/flot/)
PHP5 /JavaScript
APACHE
MYSQL

simpleFlot.zip  https://attachment.fbsbx.com/file_download.php?id=249896215178478&eid=ASulqPMaOsMEgZ1Thyo7RyqP-tVtElXuHqI-CToU6gi3MqouQbuXZARcHfM-gQ4zNIA&ext=1389676849&hash=ASsPAh2tYL_2Cn2o

Hardware:
PC Server: Xitrix i7 (optional)
MCU -Arduino Mega 2560


Objectives:
1) To store  data coming from an Arduino based sensors  using mysql
2) To poll stored data from mysql using PHP and JavaScript
3) To display the chart or graph o real-time data acquisition  online

Methodology:
1) Download or installed all required softwares
root@localhost# yum install httpd* mysqld* php5*

3)Getting  flot files
root@localhost# wget  http://www.flotcharts.org/downloads/flot-0.8.2.zip
root@localhost# unzip flot-0x.x.zip
root@locahost# cd /flot/examples/realtime/

4) Data base using MySQL
...create database
mysql> create database sensorDB;
mysql> use sensorDB;

..create table
mysql> create table sensorData ( A integer not null, B integer not null);

..populate data
mysql> insert into sensorData(sensorid,Light) values(1,45);

..check simple schema
mysql> describe sensorData;

..check stored data
mysql> select *from  sensorData;


5) Simulating data inputs in MySql using C
 Compiling myC.c
root@localhost# gcc -Wall -o myC myC.c  `mysql_config --cflags --libs`
root@localhost# ./myC


Details:

Details(0) Download site for flot software


Details(1) Web directory and files 


Details(2) C program for MySQL


Details(3) PHP script to poll data from MySql


Details(4) JavaScript using Flot graphics libraries


Detail(5) CSS code


Details(6) Simulating input to mysql-C program


Detail(7) Web real-time chart/graph demo


Remarks:


Conclusions:
A simple start of graphing  data online

Saturday, January 4, 2014

RK3188(MK802IV) Bootloading & Installing Linux-PicUntu


CS898 RK3188 Quad Core (1.8Ghz) : ceoOutlets


Introductions:
So now  I got a quad-core TV stick please bare with me the excitement of hacking this gadget.Just recently , I did the tweaking of   previous dual-core mini-stick OS from android to Linux and exploring its kernel was in-fact a great challenge of cracking skills-fortunately there were hints on the net.


Requirements:
PicUntu-1.4.5 -https://github.com/aloksinha2001/Linux3188/blob/master/picuntu-kernel-4.5.img
PicUntu file system-http://www.g8.net/download/picuntu-4-4.tgz
rkflashtool  GUI based Linux-https://github.com/linuxerwang/rkflashkit
rkflashtool  CLI based Linux -https://github.com/Galland/rkflashtool_rk3066
cs898 MK809/RK3188 mini PC stick


Objectives:
To install and boot Linux in the RK3188 mini PC-stick
To implement embedded single PC board with quad-core
To re-customized the size of Picunto software.


References:
1) http://www.freaktab.com/showthread.php?6930-PicUntu-4-4-Rootfile-system
2)http://www.freaktab.com/showthread.php?6803-Linux-for-RK3188-based-TV-boxes/page6

Details:


Details(1) Finding a new device ID 


Details(1.a) rkflashkit GitHub site -"Galland"


Details(2.b): RKFlashTool CLI  based


Details(2.c) Dump 3K3188 parameters


Details(3.a): Rkflashkit GitHub site -"linuxwang "


Details(3.b): selecting binary file for RKFlashTool GUI based


Details(3):Installed rkflasher appeared in the software center


Details(3) RKFlasher gui


.. to be continued....

Remarks:


Conclusions: