It was for a while that I did not post anything about single embedded board, but there were lots of stuffs which so intriguing to be tried and tested.It is just racing the different features of miniaturization,cost, compact form factors and of an IOT gadgets. NodeMCU wifi series such as ESP-1-14 version,which gave a slot for a cheaper or affordable price for IOT modules,also, lets add Orange Pi,BanaPi,M1-M2.Some smaller PC also were launched from the west Raspi Zero,Cherry computer and the rest of industrial grade tiny computer which are vying competitions in the enthusiast market.
Just recently, FriendlyArm company, pioneering the design of single board computer or embedded p.c. had launched their new NanoPi Series, which enticed compact and minute boards design yet including the new technical specs of their current rivals.Its a tiny PC for IOT, with price that is equivalent of a blue tooth modules 7$ to 15$ . In addition they also produced 64 bit of Octa-core CPU in a single board, thus enhancing the power of super computing at a very minimal price challenging the next version of RPi3. :)
So lets identify this new challenger seeking for the best spot of IOT modules in the geek world.NanoPi NEO and its series is small, square board, blue soldermask, ⌀3mm mounting holes in the corners. USB type-A, Ethernet jack (with integrated magnetics) and four-pin header for UART/power near one of the edges, microSD and USB micro-B at opposite edge mounted on top side, 12 and 24 GPIO pin headers (not fitted, pads only) near other edges. Allwinner H3 and single DDR3 chip mounted on the bottom. Sticker indicating amount of RAM is placed on the Ethernet jack. This device can also be ordered without USB and Ethernet soldered or you have an option for a built in wifi and eSD 8GB for a NanoPi Air.
So lets start it , roll out the text,boot it up and configure it on our own accords.
Hardware: NanoPi NEO/Air
Software: Ubunto Core with Qt embedded ,eMMC eFlasher image
Objectives:
Use to operate functions of a NanoPi
Use a tiny module of computer for IOT application
Use NanoPi NEO/Air via web controlled access
Procedures:
1) Solder terminal pins in the debug serial port of a NanoPi NEO + Air
Gently solder a tiny PCB pad with caution.
2) Download NanoPi NEO Air images
https://www.mediafire.com/folder/sr5d0qpz774cs/NanoPi-NEO_Air
| nanopi-air-core-qte-sd4g.img.zip | Ubuntu core with Qt Embedded |
| nanopi-air-eflasher-sd8g.img.zip | eflasher image which can be used to Flash image files to eMMC |
3) We will install these images using the flasher utility. I've used windisk32image-xxx ( https://sourceforge.net/projects/win32diskimager/),to flash image files in the TF card.
Booting from a TF card Ubuntu Core: 3.a) By selecting the TF card drive (E,F,G),and browsing the image file location then click the "write" button-then it will flash the image to TF card
Booting from an eMMC eFlasher image: 3.a) By selecting the SF card drive (E,F,G),and browsing the image file location ,click the "write" button to flash the image to eMMC.
4)Connect NanoPi NEO Air to your PC using any TTL-USB Serial module(FTDxx,CPxx ). At this moment, use the eFlasher images to avoid future problem in network address configurations.
5) Download a serial console software ( I've used Putty in Ubuntu)
Download putty
#sudo apt-get install putty
6) Since we dont have a video(VGA/HDMI) display, a putty generated console requires a correct serial configuration for NanoPi Air screen outputs.
# sudo putty -serial -sercfg 115200,8,n,1,N
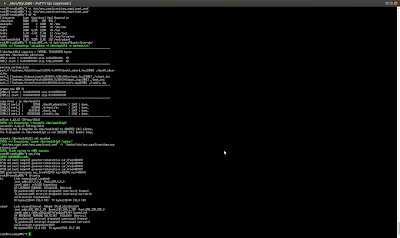
7)Open the serial console to observe scrolling text until....
#FriendlyArm Login:
Username is "root" and password is "fa"
8) After logging into the console, extend rootfs section through NEO Air running UbuntuCore.
#sudo fs_resize
Please type "y" to start re-sizing the file system and a second "y" then the system will automatically reboot. After the reboot check the new sections including block drives using this cli command.
#df -h
9)..and to see if NanoPi Air is running the four (4) x processors, issue this command in the cli console.
$cpu_freq
10) You may check the network and if not configure yet,please go to the path under the rootfs section.
# cd etc/wpa_supplicant/wpa_supplicant.conf
11) Modify or change the content of the file "/etc/wpa_supplicant/wpa_supplicant.conf"
#vi /etc/wpa_supplicant/wpa_supplicant.conf
ctrl_interface=DIR=/var/run/wpa_supplicant GROUP=netdev
update_config=1
network={
        ssid="YOUR-WIFI-ESSID"
        psk="YOUR-WIFI-PASSWORD"
}

12) To make the eMMC bootable even when there is no TF card .Running eFlasher utility command can flash Ubuntu-core to eMMC
# flash_eMMC.sh -d /mnt/sdcard/Ubuntu-Core-qte/
..after a successful eMMC flashing, this info is displayed
#INFO flash system to eMMC success
13) Save and reboot
# updatedb
#reboot
14) Check the new configuration.
Hence , you can now proceed to additional installation
either via serial console or network ssh
#ssh root@IP_address
NanoPI Air web system monitoring
http://ip_address:8888
Summary:
Conclusions:
NanoPi Air is the smallest complete "Rockstar Server" in Diliman, Quezon City :)


